Tuesday, January 27, 2015

(Jan 27) Great Location by Grand Canyon

Just wanted to pass on some great pics from our friends Michele Baird and her husband of their property in Arizona close to the Grand Canyon. They are in the planning stages of building a new tiny home there and want to use steel for framing. What a beautiful location to retire to!

Does anyone out there have any contact with contractors near the South entrance of the GC?

The best part about making new friends across the country will be having someone to visit with as we travel to all of the states. :)

Congratulations and best of luck!


Thoughts on Heating the Cabin

Tiny Housers have a real dilemma when it comes to heating. I don't particularly want propane as my main heating source. Being such a small space, it wouldn't take long to burn the oxygen out of the room. You have to keep windows cracked if not open. It's not necessarily cheap to burn either and it puts off a small amount of carbon monoxide. Anyway, not my favorite choice if I have others. Electric can be expensive to run also but at least it's very clean inside the house. We won't even get into how the idiots here in Texas produce it, electricity that is. Right now, since we're still using a generator for our power, we can only run one space heater at a time. Barely adequate when it gets below freezing. I have an abundance of free wood available but wood burning stoves all seem to be a compromise right now. I can't seem to find anything that fits just what we want.

Wish List for Wood Burning Stove:

1. Size. It has to fit in a relatively small space. I don't want to give up my entire living area for the stove. Typically for the size of house that we're seeing on the tiny market, narrow would be better than wide. Part of this is also dependent on how close you can mount it in relation to furniture and walls. It will need heat shields on the sides and back at minimum. A shield on the bottom would be nice but not critical since most will be mounted on slate, bricks or something similar. It doesn't do any good to get a small stove if it has to have 3' of clearance all the way around.

2. Heating Power. Looking for something that has a wide range of heat output, maybe 5K-20K. I want to be able to dial it down when I need. I see lots of testimony from Tiny House owners talking about their wood stove putting off too much heat. They end up opening lots of windows when it 20° because it's just too hot. I also want to be able to get a reasonable amount of heat when I need. Not often, but sometimes, it gets into the teens here in North Texas and we pretend it's REALLY cold! :) Our relatives in Maine would disagree but then they have a very different definition of hot also.

3. Burn Time. I would like to be able to get a full 7-8 hours of burn time off of a load of wood. I'm not expecting this when the stove's running full out, but I don't want to have to get out of bed 2-3 times a night to feed it either. I don't mind sleeping when it's cool. I just want the fire to keep it reasonable through the night. I'd like to be able to just throw a log on in the morning to get it going again instead of starting from scratch every time.

4. Cooking area. I would really like a stove top cooking area to take advantage of the fire when I do burn one. I'm not talking about heating a kettle of tea. I want to put a skillet on the stove and cook supper. I don't need a huge area but big enough for a cast iron skillet would be nice.

5. Glass door. Part of the draw of a wood stove is getting to watch the fire. Think about those cold mornings when you stoke the fire and throw on a few extra logs so that you can hang out in the house and watch the flames dance, drink a cup of coffee and plan the day's activities with your sweetie. This is a must!

6. Direct vent. I don't want to worry about oxygen levels in such a small space. I remember last year, there was an piece in the news about a couple that asphyxiated in the cab of their semi by lighting a candle before the went to bed. I want a fresh air draw so that I don't have to think about it.

7. Water heating capacity. The option to pipe a constant source of water through the stove while it's burning would increase it's functionality a great deal. Water for dishes, bathing, an outside hot tub, secondary heating though a radiator - lots of options here.

8. Forced Air Fan. This can effectively double the BTU output of a stove. Needs to be quiet though as it's in a tiny room. Variable speed would be really nice, too.

9. Ash Tray. This is such a handy feature on a wood stove. Just pull the tray out, dump the ashes and slide it back in. No shoveling, no vacuuming. Very convenient. The only draw back is that you can't have bricks lining the bottom of the firebox. At least I haven't seen one that offered bricks with slots between them for the ash to fall to a collection area.

10. Burn Box. One of the drawbacks of a little stove is the little burn box. Some of these I've looked at require a very short log, some as little as 9"-10". That's too much cutting for me. I would like to put a reasonable 15"-16" log in it. I cut my own so it's not a matter of having to pay for it to be cut and then having to cut it again. This also directly effects the burn time we talked about earlier. How much wood can you pile in before you go to bed?

11. Price. It shouldn't cost an arm and a leg. Funny how the larger stoves are the least expensive. Try to find one for a Tiny House, and you'll drop $1,000 to start with and go up from there. My budget is not in range of the Dickerson Stoves either. Stylish as they are, $3K-$4K for a stove is not happening in my house.

12. Waste Oil Burning. No, this isn't a feature you find on commercial stoves but we're talking about MY wish list. Maybe this is the answer to long burn times. You could have a nice pretty roaring fire during the day and drip in some oil to burn through the night. Either way, this would be a nice feature as long as you can maintain enough heat to burn it cleanly without overheating the house. Most of the time, you can find a source of waist oil (restaurants, food supply, etc) that will gladly give you their spent oil. They typically have to pay someone to come and remove it on a regular basis. Basically the same stuff that you're looking for if you're making bio-diesel. you just don't have to be quite so picky about the initial quality. BTU potential for oil is huge also. 7 lbs of dried fire wood = about 56K BTU. The same weight of waste oil is 125K BTU (the same as gasoline) and it fits in a much smaller container and just happens to be free. Waste oil works best with some kind of material to act as a wick. I've seen this be as simple as a handful of straw in a stainless steel bowl.

13. Baking Oven. I've given up on the reality of a baking oven in an affordable stove but I'll list it here since I'm dreaming. :) These bad boys start at about $3K. Oh, but wouldn't it be wonderful to watch and smell a loaf of bread baking in your little stove as you shared a bottle of wine and prepared your dinner. :)

Thus, I am working on designing a stove that I can build myself. After all, I need a hobby. Welding is a very valuable skill to possess, especially if you're living on a Tiny House budget. Nice to be able to build and fix things on your own. You might actually get good enough to earn a little cash on the side. I'm also in no immediate hurry. I can probably piece the parts together over time for very little cash and work on construction as I get the chance.

I'll work on putting together a review of stoves I've looked at so far. Why I considered them and how they measured up to my expectations! In the mean time, we'll keep running our generator and electric heater and hope we don't get any really cold weather.

Monday, January 26, 2015

(Jan 26) Taping and Bedding

Well, we got the drywall installation completed. I was pretty sore last night when we crawled into bed but feeling much better this morning. Had my younger daughter, Sabrina, out for the day. She wasn't thrilled about putting up insulation but she did great on taping and bedding. We got the 1st coat done. Hopefully can get 2 more coats on this coming weekend. We have to get home in time for the Superbowl!


Weather was perfect. Mid 60s and a light breeze. I'll be anxious to see how much it takes to heat this space. Maybe we'll be out when the weather's cold again and we can test a couple of options. We have a Mr Heater (propane) that puts out up to 9K BTUs. We also have an electric space heater that puts out about 5K BTUs. Trying to gauge how big a wood stove to build. Looking at getting my first welder and that will be one of my first projects. I may also build the bed frame for our Murphy bed. We bought a bed frame this past week to try but I just don't think it's going to do the trick. It's nice when you need to pull a spare bed out but not what I'm looking for. I will also likely do a lot of welding on the storage building/shop we're planning to build next. It's time to learn how.

Monday, January 19, 2015

(Jan 18) Drywall Going Up Nicely

We really struggled with the decision on how to do the drywall. Should we hire a contractor or try to complete ourselves? I really want the walls to be smooth and clean since that will set the tone for the rest of the room/house. (Funny how they're the same now! :) In the end, we agreed we would tackle this like everything else we had done, once piece at a time and on our own. Best decision we made was buying a RotoZip saw ($69 at HD). Basically a mini hand-held router. You put the sheet up on the wall (tack it securely) . Don't worry about window or door openings. Plunge the router into a clear area inside the opening. Move to the edge and follow it around the opening. Within seconds you have a very smooth cutout of your opening and you're ready to finish fastening and start trimming. This was much smoother and faster than the hand saw we had been using. It also makes quick work of the openings for wall outlets and switch boxes we had marked up. It takes a pretty firm hand as it wants to wander but once you get it moving along a path it follows your lead. Just keep a firm pressure against the edge of the opening you're cutting and keep pushing along. I did break a couple of bits as they bound up in some of the joins of the steel framing. I had anticipated this and purchased extras ahead of time. They were pretty inexpensive. All-in-all, it really saved us a lot of time and effort.

RotoZip saw

Thanks to our new friend (Cory Hagen) that we met through the DFW Tiny House Enthusiasts, we were able to get 3 walls completed this weekend. His enthusiastic help was greatly appreciated as were the donuts he brought! He has some really nice design work that he's done on his own Tiny House plans and we wish him lots of luck on his venture to design for others. We'll be reciprocating the favor and offering him a hand as he starts his build.

Cory Hagen setting screws in drywall. Me, measuring and cutting the openings. He did great for his 1st time. We made a pretty good team!


 It's so exciting to see the progress. This weekend's effort finished off 3 walls and part of the 4th. The remaining space should take 6 sheets to complete and hopefully we can do that next weekend. The weather was amazing (mid 60s) both Saturday and Sunday and made the work very comfortable. Cory and I were busy on the South wall when Kim broke away to cook some supper for us all. Chicken Caccatori sans the pasta. Our gas camp stove had developed a leak in a hose (Kim calmly reached down and turned off the gas tank as it was spewing fire out the side of the stove!) so we got the benefit of supper cooked over an open fire. Guess you could dub it an Italian Chicken Stew! Really good, honey!


It had cooled off a lot outside as the sun had been down for a couple of hours and a hot dinner was very welcome. We turned off the generator and lit the tiki torches to enjoy our dinner in peace. After a great dinner and great conversation with Cory we moved our chairs to sit in front of the chiminea where there was still a nice fire going from Kim cooking supper. Crystal clear night and the stars were out in force. Right on queue, the coyotes kicked in with their contribution to the night's atmosphere at about 8:30. They didn't sing long but it doesn't seem like the day is complete without hearing them anymore.

Cory must have brought us good luck for as we were giving him the nickel tour of the property that afternoon, we saw 3 deer (two does and a fawn) scampering along the trail. We had been pointing out the deer tracks as we made our way down the path (as we had done many times over the 2 years out here) but never before had we actually spotted any of our wards. And what luck to actually have a witness to the sighting! We committed to putting out some corn for them from now on. We were lucky enough the next day to spot a buck close to the same area as we were hauling our load of feed to the back of the property. Wow! 2 days in a row. It's official. We've got deer! I know, lots of you are laughing at our enthusiasm for what you probably see all the time. It's just been frustrating to see the tracks daily for nearly 2 years and never spot a single deer. Hopefully, it's a trend that will continue. We decided to feed them at the back of the property as to not encourage them to too much exposure. I would feel really bad if our feeding them lured them out of woods only to get them shot!

Grrrr. As I'm finishing work last night, I realized a major faux pas! We didn't plan for any electrical outlets on the outside of the house. What were we thinking?! We've always used the generator and just flat didn't plan for them. Luckily we haven't' finished the north wall, drywall or outside Hardi board. We'll be able to add 2 outlets to that side of the house without much trouble. I just don't see it happening on the south side without some real work. I could always run some conduit under the structure. Nice thing about the building being so small is that we won't have far to go, even if I just leave it with the outlets on the north. Extension cords I've got and it's only 12' around the corner. :)

I continue with plans for a storage shed. Depending on money, we may break ground on it next weekend. It was no less than a couple of hours to move all of the tools out of the house and put them all back this weekend to make room for the drywall installation. Our limited shelf space is also taken up with things that would really be better served somewhere else - insect spray, motor oil for the go-kart, spare parts and chains for the chainsaw, nearly a dozen saws of every variety, tarps, etc. I truly don't think we could do a mobile tiny house. I'm just not willing to let go of that much stuff. I like having tools and working on projects. I do think it funny that our storage buildings will end up at 3 to 4 times the square footage as our living quarters. But isn't that what a bunch of this is about? Living Large in Small Spaces! Living responsibly within a minimal financial commitment. The more square footage we shift from living quarters to storage, even if it's on our own property, the lower our financial burden will be - lower building costs, lower utilities, lower insurance, lower taxes. And, we still get to keep most of our stuff. We just don't have to build in lots of storage to the main structure. A tiny house for financial freedom, a large storage and workshop area plus 12 acres to work and play on equals a lot of happiness! I wish we could hurry and finish this all so that we could afford to retire! :)

Sunday, January 4, 2015

(Jan 4) Kitchen Counter Build and Install


Hope the new year is treating you well! We decided to brave the cold (stop laughing, those of you that are north of Kansas!) and come out for the weekend. After having spent the entire day out in freezing rain (I went to the Armed Forces Bowl in Fort Worth Friday. Miserable day, amazing finish to the game!) I still wanted to go out to the property and work on the cabin some. We only have a small propane heater and I was skeptical whether it would keep up with the near freezing weather, so we stopped and bought a gallon of Denatured Alcohol to burn.

We got to the cabin late Friday night and it was about 35° inside. We poured up 2 quart sized metal cans full of alcohol and fired them up. We also got the propane heater cranking. Yes, I left a window open for plenty of circulation. I can only imagine how quickly 3 sources could burn up all of the oxygen in our little space. We got the temp up to the low 60s which was very comfortable and only a few degrees lower than we keep our large house in the winter. Problem was, we burned up all of the alcohol that night and the propane heater wouldn't keep up the next night. Saturday, we did good to keep it above 40° through the night. It was a bit chilly but still better than last year when we were sleeping in a well ventilated tent through the winter. Those were some cold nights!

We picked up some supplies to finish insulating the walls and looked for some options to improve the alcohol heater. Finally came to the conclusion though that it's just really expensive to burn alcohol. It was $16 for the gallon at HD and it probably only burned 4-5 hours. I can get 10 hours of electric heat by running our generator for less than $10 now that gas has fallen in price. We really need to work out a permanent solution. Good thing winter is only 2-3 months here.

We finally decided that we would install the countertop that Kim found on clearance ($30) at IKEA. We laid it face down and built a frame inside the opening.  Took that out and built a second. (We cut all of the steel and dry fit the pieces before we attached them just to make sure.) This way we knew for sure that they would fit and be identical. Next, we connected the two frames with some legs. All-in-all, it took a couple of hours to complete. I had all of the steel left over from the house build. It's just been sitting in the woods providing a home to the spiders and bugs for a year!  Anyway, the countertop now gives us a good work space in the kitchen and provides a place to keep all of the cooking supplies out of the way. I'm pretty happy with the way it turned out.

When we end up with a full sized fridge at some future date, I can take the legs off and shorten the cabinet to accommodate. Great thing about steel, you can just unscrew it and adjust it later!

We turned the countertop over and used it was a template to build the cabinet base. 

Here's the corner of the kitchen where it will go.

Bottom of the base done with legs attached 

Attaching the top of the base.  

Base, completed and in place 

Countertop installed on base 

Can you believe it fit next to the fridge without any trim or adjustment?! Beats cooking on TV trays like we've been doing! :) 

Yes, that's a bottle of Maker's Mark on the fridge. Our reward for working in the cold all day was a large, hot whiskey sour with our grilled pork chops. Sorry for the noise in the video. That's dinner cooking!


We're hoping to buy some more building supplies by the end of the month and finish up much of the project. We've got a Murphy bed to build. (We worked on the design last week and feel we have the concept down.) I think we'll be able to get the Tongue & Groove for the ceiling, finish the sheetrock, trim (already purchased) the windows and doors and get the flooring (already purchased) down over the next couple of months. We've also got Hardi siding to finish outside as well as soffit as soon as the weather cooperates. Next after that will be the cistern and water catchment/filtration system. Right now, it's still too easy to bring a couple of jugs of water from town. After that, we'll have to make a decision on electric service. It'll be good to make some significant progress again!

Take care and stay warm! 

Thursday, January 1, 2015

Friends & Fellow Tiny House Dwellers

Blogs:
Tiny House Blog - Kent Griswold
A Bed Over My Head - BA Norgard
The Big Tiny - Dee Williams
Off Grid And Underground - Steve Rees
The Tiny Life - Ryan Mitchell
This Is The Little Life - Lina Menard
Let's Build A Tiny House - Kyle & Jennifer
Equinunk Cabin - Adam & Karen
The Life Center - Wayne Seboro
Tiny House  Growing Family - Bjorn & Bailey Carlson
The Workhouse - Conor Mccann
Tiny Cob Cottage - Craig
The Tiny Tack House - Chris & Malissa Tack
Another Tiny House Story - Jess & Dan Sullivan
Shedsistence - Robert & Samantha
Long Story Short House - Joe Coover
Big Lake ~ Tiny House - Pete & Erin
A Tiny Home Story - Cory Jean
Life in 120 Square Feet - Laura LaVoie & Matt
The Tiny House-Wife - Jordan Check
Living Tiny Canada
DIY House Building - Tom & Shaye

Builders:
Texas Tiny Houses (Texas)
DIY Tiny Homes (California)
Tennessee Tiny Homes (Tennessee)
Tiny Home Builders (Florida)
Tiny Treasure Homes (California)
Nomadic Cabins (Texas)
Tiny Mountain Houses (California, Washington, Oregon)

Tiny House Plans:
Tiny Modern Homes (Custom Home design by Cory Hagen)
Four Lights Houses (Jay Shafer)
Tumbleweed Tiny House Company
Tiny House Design
Country Living
Pinterest Tiny House Plans Board (Just one of many)

Component Resources:
Tiny House Basics

For Sale/Rent:
Tiny House Listings
Tiny House Swoon
Tiny House Living
Tiny House For US
Tiny House Post (TH related classified ads)

FaceBook Pages:
DFW Tiny House Enthusiasts
Tiny Yellow House & RelaxShacks.com
Small House Smitten
Tiny House Resource Group
Tiny House Swoon
Tiny Quality Homes
Living Off The Grid
The Not So Tiny, Tiny House On Wheels
The Life Village

Tiny House Communities:
Simply Home Community (Portland, OR)
DFW Ecovillage (North Texas)
FourLights Tiny House Village (Sonoma, CA)
Quixote Village (Olympia, WA)
Caravan Tiny House Hotel (Portland, OR)
Opportunity Village (Eugene, OR)
Tiny House Village (San Francisco, CA)
Tiny House Community Startup (Portland, OR)
Spur, Texas - Tiny House Friendly (Spur, TX)
The Sanctuary Minnesota - (Ogilvie, MN)

Newsletters & Publications:
Tiny House Newsletter & Tiny House Talk - Alex Pino
Small House, Big Decisions - Mother Earth Series following Jennifer & Tyler Kongs
Four Lights - Jay Shafer

Stories of Others:
Great Location By Grand Canyon - Michelle Baird
Underground Earth Sheltered Tiny Home
Energy Expert Builds Off-Grid Home
Tiny r(E)volution - Andrew & Crystal Odum
Vina Lustado

Energy Conservation:
Paul Scheckel - Energy Consultant

Building With Steel

I get a lot of comments and questions regarding building with steel instead of wood. I thought I would write a little about the subject. I want to add, I am not an expert in this field! I've never made a living at it! These are the observations I have made from working with both. Most people I know that scoff at steel construction have never built anything with steel. They just feel threatened by something new or something they don't understand. Kinda like Mac vs. PC. Someone who has never owned a Mac would say that their PC is just as good though you would rarely find someone who had owned both making that claim.

Project Parameters:
Build a small and sturdy residence in the woods. Plan on moving to the property somewhere in a 5 year time frame as we are both still working 90 miles away. Do the construction ourselves for multiple reasons - keeping the cost down, having a hobby we both could enjoy, sense of accomplishment, etc. I wanted something which would be long lasting and low maintenance since there's no such thing as maintenance free! :(  I'm in my 50s and have 3 herniated disks in my back. My wife is 5'3" and afraid of heights. I needed something we could work with that was light weight but I also wanted something strong and durable. We ruled out a 2 story structure and eventually even eliminated the prospect of a sleeping loft. (No one my age wants to wake up and climb down a ladder in the dark of night to pee!) When we were planning our Little House in the woods, I wanted to do so without a mortgage. This meant buying materials as we went. We didn't have a budgeted amount to spend monthly or a good estimate of what the building would cost. We just wanted to take whatever we had left over that month and add to the project as we went. It might take 3 months, it might take 2 years to get it dried in. We had to plan for something that would withstand the weather while under construction. After researching the matter for quite some time, I came to the conclusion that we had 2 choices - concrete & steel. Concrete cinder blocks would be something we could use. I could buy a handful at a time but the weight of the blocks in addition to the weight of the concrete it would take to put it together put this on the "NO" list. Steel, on the other hand, was light weight and went together like a stick house. (I really don't like the look of concrete block houses.) It would also weather well if the project got delayed or suspended for a while. Steel it was!

Description of Products:
Steel comes in dimensional members much like wood - 2x4s, 2x6s, etc. It typically has a differentiation of Track or Stud. Track is an open mouthed C and is a fraction wider in order to accept a stud into the open end. Studs have a lip that is bent over the opening to give additional strength. Many supply houses carry the track in a standard 10' length. I found out too late that I could have ordered it in any length I wanted at the same /foot cost. 10' was easy to transport but I would have used longer section so that there was no break.

 Stud

Track


Steel v Wood

Advantages of Steel:
1. Stronger than wood - The same steel dimensional member (2x4 or 2x6) is typically 5x stronger than it's wood counterpart. Wood studs in a wall can typically withstand about 500 lbs of pull before they separate. A typical steel stud would withstand 2500 lbs of pull before it starts to fail. Steel is measured in gauge or thickness. By offering the same component (2x4) in varying strengths, this allows you have longer spans without using multiple members. If you have a floor or ceiling opening that's 30' to span, with wood you would need need to go to a larger dimension, say a 4x12 or 4x14. With Steel you could still use a 2x configuration (2x12 or 2x14) and just dial up the strength. Typical structural steel is 18 gauge but it is also offered in 16, 14 & 12 gauge. You can also nest components for additional strength by putting a stud inside of a track and creating a single width beam. We used 18 gauge steel for almost all of our house. The exception was on the roof. We had a large overhang and I wanted to make sure it was secure enough to walk out on top of. Here I used 16 gauge.

Detail of the beam we used for the frame of the flooring. Stud inside a track and secured together. 

Frame that we built the house on - 12' x 20'

2. Lighter than wood - Steel is much lighter for the same strength component and often for the stronger component. Kim and I were loading and unloading all of our own materials. We were climbing ladders and installing 18' ceiling joists. We could not have managed this without a lot more wear and tear on our bodies without steel. I would think that a lighter and stronger component would be very desirable in a mobile Tiny House.


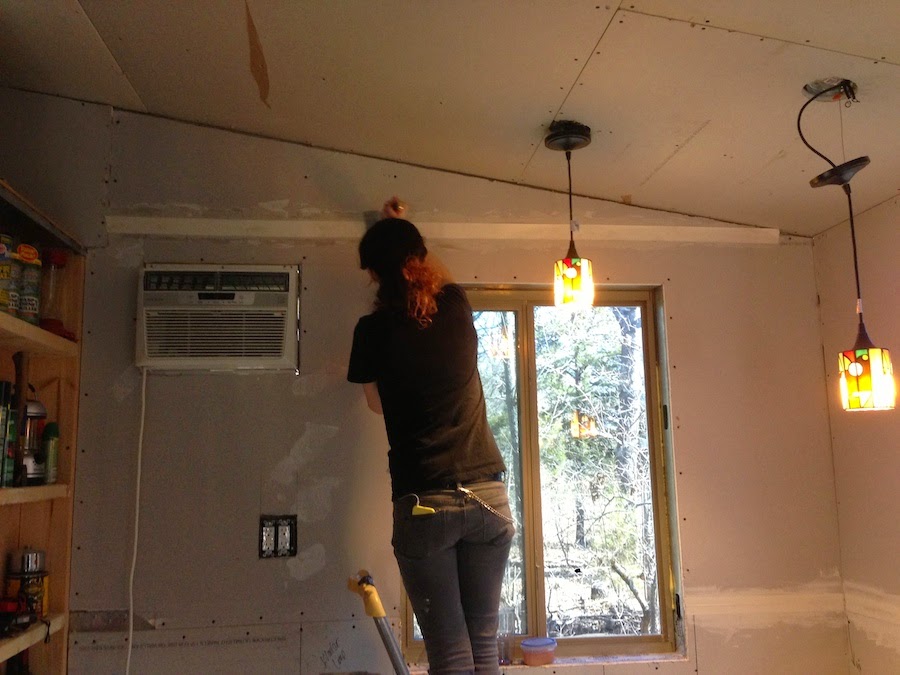
Almost finished with framing

3. Weatherable - We couldn't afford all of the materials and time needed to get the house dried in in a short period. We needed something that could sit out in the rain, for months or years at a time if needed, without warping or rotting. This meant steel. Galvanized and weatherproof, this would work. There's a custom home builder here in North Texas that builds with steel. I noticed a steel frame in one of their neighborhoods several years back. They built it for demo purposes to show people the skeleton of the house. It had been there for several years when I noticed it yet there was no weather damage. They could have sheathed the house and put a roof on it as it sat.

4. Consistant Pricing - Steel is priced by length and by weight (gauge). Much like wire, the smaller the gauge, the thicker (stronger) the metal. Your pricing will be by the component and length. it doesn't get more expensive as it gets longer, like wood. Try ordering a bunch of perfect 20' wood 2x4s and compare the price per foot to 8' components. The reason is simple. A tree that yields a perfect 20' 2x4 is much rarer than one that is suitable for smaller lengths. Steel is delivered to fabricators in large rolls. They feed it off of the roll and into a machine that rolls and forms the shape desired. This means you can design and order the components for a project at the exact dimensions you need instead of 2'-4' increments, knowing you will need to cut off the ends and throw them away. If you want the wall height in your Tiny Home to be 10'7", you can order the studs in that exact length and only get charged for that length - no waste. If yo were building out of wood, you would have to order 12' components and cut them to length, wasting the other 1'5".

5. Durability - There's something very comforting about building a house in the forrest made out of a material that's water, insect and fire resistant. We hope that by building out of avery durable materials, our Tiny House will be here for 100 years or more.

6. Straight & Consistent - If you've ever built with wood, you either have to go to the lumber yard and hand pick each component or you have to order more than you need because you know that you get boards that are warped or arched or have knots and weak spots in them. Steel is straight and consistent, pretty much all of the time! You get straighter walls with a lot less effort.

Studs going into track for 1st wall. 

7. Environmentally Friendly - Steel is 100% recyclable and very long lasting. You can order the components at the exact length you need, reducing waste as well as labor and resources to cut them to fit. You can also take all of the scrap that you did end up with to a metal recycler and sell it. It will be melted down and used in the next project that comes down the road. Steel typically lasts longer than today's wood components. Wood construction material is made from soft woods that are harvested from fast growing trees. It would be cost prohibitive to frame a house out of oak or hickory for this very reason yet you can build with steel and use a component that is rot/insect/fire resistant, stronger than Oak and a fraction of the cost. Our scrap steel from our house project is still out at the property in a Walmart tote. I kept waiting to see if we would fill it up before we took it to the recycler. We haven't filled it up yet - maybe when we build the decks and the storage building. :)

Advantages of Wood v Steel

Wood is not without advantages. It's cheaper than steel in short components. When buying in typical 8' lengths or less, wood is cost effective. That gap closes though as the boards get longer. You also have to look at how many components you have to use to get the strength you need in a wall roof or floor. If you have to order 4x or 6x wood components to make a span, you can often buy the same strength 2x in a thicker steel component. You also need to look at permanence. To have wood last, you often need to use pressure treated components. These still have a limited life span but last much longer than untreated wood. They are also much more expensive than untreated wood so you should consider this cost when estimating. Consider how often will the building have to be repaired or torn down. Steel will typically last 3-4 times as long as wood, depending on the environment. Wood is easier to attach other wood components. You just nail them together. Things like small trim boards and narrow strips of wood are easier to attach to a wood backing than to steel though typically if I have these components, I use an adhesive like Liquid Nails. Wood is a better insulator than steel. You will get some transfer of heat and cold through steel components. This is a bigger concern for bigger houses as they are MUCH more expensive to heat and cool. If your typical heating cost on a Tiny House is $30-$40/mo, a couple of % increase in heating cost is not that big a deal. If you have a large house and your heating bill is $500-$600/mo, it's a bigger factor.

Attaching Steel to Steel
Primarily by self-tapping screws. I have a clamp that I use to secure the 2 pieces together for at least the 1st screw. Most of the time I can release the clamp and set additional screws after that. Most specs require 2-3 screws per intersection just like you would use 2-3 nails on a wood counterpart. They sell these at the drywall supply shops.

Attaching Sheetrock to Steel
There are self-drilling drywall screws just like screws made for wood. Drywall suppliers and some home improvement stores.

Attaching Wood to Steel
I either use self-tapping screws or I drive steel pins with an air gun. If it's only a couple, I use the screws. If I have a lot to do, like siding a wall with OSB, I fire up the compressor and use the air gun.

We did find an option for "nailing" boards to steel but it meant buying a tool that we would not typically have bought. That being a siding nailer. Specific nail guns are compatible with steel pin coils (just like nails, except sharper and hardened to penetrate steel) and are used with a compressor just like a regular nail gun. You do need lots of pressure so make sure your compressor will deliver 120-150 lbs. Other than that, you load the nail coils and fire away. The steel pins that are used are less forgiving than nails. If you do not have your components properly aligned, you will likely have to use a cut-off and cut the pin out. They have an incredible holding strength. We went with a Max (SuperSider CN465-S) gun as it was more readily available at the time we were ready to purchase. Aerosmith also makes a gun as well as their line of pins. Here's a brochure on the subject:


Cutting Steel
We bought a Dry Cut Metal Saw at Northern Tool for cutting the studs and track. Many people use a high-speed cut-off saw with an abrasive disk but I found this to be very crude. It uses brut force to burrow through the steel with a thick, rough disk. Lots of sparks. Metal is literally melted through. Ends are rough and VERY hot after a cut. The Dry Cut Saw we bought was made for this and uses a carbide steel blade at a low RPM with high torque. Just pull the saw down and let it work through the steel. Very little sparking. You get a VERY clean cut that's just warm after the cut. It's a dream! I find it cuts better when you sandwich 2 pieces of steel together. They tend to support each other when it gets to the loose lip or flange of the member. The blades are more expensive for the Metal Saw but they last a long time. I think we went through 2 building our house. The abrasive disks on a regular cut-off wear out quickly. You can also use this saw to cut just about any metal including rebar, fence posts, any steel up to about 2" thick. We also got a small cut-off saw (uses thin 4" blades) from Harbor Freight for trimming and splicing. I found the metal too thick to effectively use tin snips though I didn't buy any electric ones. When we were installing our steel roof, we used a circular saw with a plywood blade turned backwards. It cut like a champ. This is a thinner steel (25 gauge) than the structural steel (18 gauge) we used on the framing.

Kim cutting steel with the Dry Cut Saw


Here's a list of sites that will help when working with steel:
Steel Construction Guide (my favorite illustrated guide for construction)
Aerosmith Fastening (steel pins that are used like nails)
Great Air Gun by Max
Builder's Guide to Steel
Fastening Clips
Insulation Supply Company (my supplier here in North Texas)

(Jan 1) Happy New Year!

We hope you had a very Merry Christmas and will have a wonderful 2015.  Happy New Year everyone!

~ Kim and Jay Merrett

Hi there!  This is Kim.  Thank you for reading our ramblings and taking an interest in our project.  Usually I take the backseat on the blog and quietly add to what Jay writes.  This year I'll write some posts of my own.

Our (my specific) goal for 2015 for the cabin is to get it finished!  That would seem obvious, but it has taken a little over year to get to this point with a "pay as you go" financial plan and working only on weekends.  I'm trying to be patient, but it's not a natural part of my character.  The good news is the building is all paid for which is worth taking the time to pay for materials and build as we can.  Jay and I have chosen to purchase building materials instead of gathering and re-purposing.  This has made the build go faster, but also more expensive.  If you have the time and energy to treasure hunt for re-purposed framing (wood or metal), flooring, doors, windows, fixtures, etc. it may save you lots of money.  I highly recommend it to cut down on the expense of your build.  We will do this with the workshop we are planning for the next build.

We have come a long way, however there is much left to do.  Eventually there will be a deck around most of the house to expand our seating and dining area, but that may have to wait until later in the year.  At the moment we have pallets as a temporary front porch across the front of the house.  This actually works pretty well in keeping most of the dirt etc. out of the house.  Dirt and leaves on our shoes fall between the slats on the pallets and are not brought into the house. During a rain, they keep mud from splashing up onto the siding.  I'm pretty impressed with how they have held up to being exposed outside over the past several months.  It's not a permanent deck, but works fine for during construction.  I've seen videos (check out YouTube) of impressive permanent decks made from recycled pallets.  It's an option if you can find the heavier duty pallets, which have better quality wood.  Lightweight pallets are fairly thin and not meant for more than light use.  Jay's employer gets quite a few pallets.  They actually pay a company to come haul them off when they are finished with them.  Not all are good for re-purposing, but some are.  We haven't taken the time or initiative to haul them out to the property, take them apart, store them etc.  Maybe one day...

The outside Hardie (fiber cement board) siding is only about half done.  This is high on the "to do" list this year as soon as the weather gets better.  There is a water meter along the front of the property but it's a long way from the cabin thru the woods so the expense and effort to dig a trench and lay pipe hasn't been a priority.  The ground has never been disturbed and is very wooded so trenching will be a major job.  A rainwater harvesting system is in the plan, but we haven't focused much on the details so it's lower on the to do list.  Currently we take water out in 5 gallon bottles, which has worked just fine. This simple handy stand and dispensing spigot have worked beautifully.  We use it all the time when needing water for cooking, washing dishes, hand washing etc. I may get a second one so I'll have water easily available both inside and outside.

Click here for details:  WATER DISPENSER

We are almost done with the drywall inside.  The shower is finished; we have shelves installed inside the interior walls of the bathroom and a section in the kitchen.  A small window a/c unit is installed in a wall instead of where it used to be in a window.  Jay has photos posted of these in some of his recent posts. The electrical wiring is in for lighting and power outlets in the bathroom, kitchen, and living area.  We installed some outlets with USB ports for charging our phones.  The off grid/on grid question is still up in the air.  We currently use a generator for power and cook either on our wood burning chiminea for grilling, a outdoor two burner propane camp stove or an electric two burner cook top inside.  All of which work find, but I do occasionally miss having an oven.  I'm not ready to invest in a camp oven, which seems temporary so I'll wait until the kitchen is closer to being finished and decide what to put in then.  Kitchen cabinets and appliances are still in a planning stage at this point.  NOTE: If you plan on spending any time in the kitchen and you like to cook, PLAN THIS FIRST.  Don't just think, "It will work out".  It may work out but it may not be what you want to live with everyday.  We've decided to use tongue and groove planks for the ceiling and I'm anxious to get them installed.  The flooring was purchased on sale and sits in boxes in the cabin.  It won't be installed until we are further along with the drywall and probably the ceiling.

This is what we chose: SMARTCORE
SMARTCORE by Natural Floors Cottage Oak Floating Vinyl Plank (Common: 5-in x 48-in; Actual: 5-in x 48-in)

Our immediate project or challenge is a DIY wall bed/murphy bed plan.  DIY because we think (hope) we can make one for less than we can buy one, Jay has a pretty cool plan for some multipurpose functions for the face of the cabinet, plus the only space we have for a bed is going to be a really a tight fit which requires some creativity.  This is where I want to STRONGLY ENCOURAGE anyone who is planning their tiny home to draw, plan, measure, then draw, plan, and measure again.  When you think you're done... do it again!   Go measure appliances, furniture, doors, windows, fixtures, etc.  You may have to do this several times as your plans change, because they will change - probably many times.  When we started this project, it was only going to be a combination camp/storage building while we built a permanent home.  The farther along we were in the build the more we felt comfortable with the size and the possibility of making this a permanent home.  However, we were far enough along that moving doors and windows after they were installed was NOT (at least in my mind) going to happen.  Jay would have moved them, but I couldn't see all the work being undone then redone.  To live with what we have already built and include a real bed (instead of the current air mattress) a bed will have to be custom.  Jay really wants a queen size bed so his feet don't hang off the end.  LOL   Okay, I see that.  I'm short enough that a full size bed would be fine, but I guess he should be comfy too.

Gotta run… Jay is up and making breakfast.  :)   Poached eggs, bacon, toast, and hot tea.  Yummm.

Have a great day!