Thursday, April 16, 2015

(Apr 14) Cistern Has arrived

Well, they warned me it big but I didn't put it together until I saw the fork lift come around the corner with a monster tank, mine. We had just purchased our 1550 gallon above ground cistern. I was really excited about picking it up and am looking forward to our first drink of rainwater.


The 100+ mile drive back from the manufacturer (Norwesco) in Fairfield was not a pleasant one! I had taken 16' straps to secure the beast but even they weren't long enough. I had to splice multiples together to get them to reach from one side to the other. Once it was synched down tightly, I hit the highway. About 60 mph was the best I could make without the wind turbulence throwing the truck around and as traffic was moving 75-80 mph, I got more than my share of stares and dirty looks.

The relief of the trip was just outside of Athens in Malikoff where I took a break from the road and toured some park model homes at Premium Cottages. I was very impressed with most of the models. Cement-Fiberboard cladding, vinyl plank flooring, full sized appliances, split mini AC systems and lots of windows. Numerous models priced in the $40Ks which I though was fair for the features. They were also very nice and spent some time talking to me about the company and the features available. The rep that was helping me said that they didn't have a lot of experience in building Tiny houses as most of theirs were between 300-400 sf but that they had built several smaller than that.

Back on the road I was comforted with the bag of brownies and cookies I had picked up at Collin Street Bakery. Delicious as always! :)

Upon arriving at our property, seeing as it had rained heavily the night before, the driveway was flooded again and I took a few moments to gather my nerve to run it with my load. After having to get our vehicle un-stuck a few weeks ago, I've been a little more cautious. I got out and walk (waded) down the path to plot my trajectory. Just get a good head of momentum and don't slide off and hit a tree! It's worked so far and got me to the cabin again today. :)  I promised myself, when (if) it dries out good, I'll get some road base delivered and cure this problem. I just need to get through the Spring.

When I reached safe ground, I got out and examined the spot that I would unload the tank. It is heavy duty plastic but it is still subject to puncture if offered something sharp. I walked the area several minutes and found a smooth and clear area. I decided that I would lay some metal wire racks that I had recently purchased at an auction down to act as steps for the beast to roll off onto rather than just letting it fall off the end of the truck. I put them in position and started to adjust the cistern. To my surprise it just started rolling and just as I had plotted, it landed on a nice flat, open area although on it's side. It didn't take much and I was able to right it. That's where it will have to stay until we get some gravel/sand laid as a pad closer to the cabin. We'll tackle the challenge of moving it when we get that far. Until then, it can just sit there and look pretty!


Wednesday, April 8, 2015

(Apr 5) Tongue & Groove Ceiling

Besides the 4 hours we spent at Home Depot, it was a pretty productive day yesterday. We got all of the materials for the ceiling purchased as well as a custom door we found that we'll use for the bathroom with a bard door kit.

First, let me say. Be picky about the lumber you get for tongue and groove. We went through it pretty good and still ended up with a couple of pieces that I wasn't sure were going to work out. Even a slight bow in the wood makes the task MUCH harder.  We got through about 20 pieces of the 45 we bought but some of them were work. The other challenge is that you're working over your head. I'm not sure which is worse, holding your arms upright over your head for 3-4 hours at a time or climbing up and down a ladder several hundred times. I'm really hoping we finish the other boards this coming weekend but if we don't, it's OK. We'll work at it as we can. Don't plan on completing any significant work per day without some major aches and pains. :)

That said, I think it's really turning out nice. We had every intention of white washing it when done but now that we've seen it installed, I think we're leaning towards just oiling and sealing it. I love the honey color of pine and the oils will just pull out the depth of the grain.

Here were some pics after a batch of boards went up.


We both agreed after seeing a significant section up and installed that it's making the ceiling seem shorter. I'm glad we're leaving it light colored. I can't imagine what it would do to perspective if it were dark. :) 

I'm using a Porter Cable brad nailer that I picked up this weekend. I've been very happy with it so far. It's light weight but solid. Holds about 100 nails per clip. Reloads easily and shoots as expected, every time. Since we didn't have purlins to nail to, we went ahead and ran a bead of Liquid Nails down each board before it went up. By the next morning, it was set up nicely and very solid. 


Slept in on Sunday through the rain. We got another inch or so through the weekend. Add that to the really wet March we just got through and we've already hit about 12" so far this year. Off to a good start. Last year was a bit shy at just under 30" compared to the 44" average. To give some perspective. Just on our 12 acres, the 12" we've received so far this year means that we've taken about 4,000,000 gallons of water weighing about 32,000,000 pounds. 

1 acre = 43, 560 square feet x 12 acres = 522,720 square feet x 12" of rain = 522,720 cubic feet
522,720 cubic feet = 3,910,217 gallons x 8.33 lbs per gallon = 32,572,108 lbs of water

Our yearly average of 44" of rain will produce over 14,000,000 gallons of water, just on our land. For drinking, bathing and washing (dishes & clothes), Kim and I will use about 1000 gallons per month. I don't need to catch much to be set. We've got our cistern on the way, 1,500 gallon. Our roof size is 414 square feet. With our annual average, that's about 11,000 gallons per year plus the million+ gallon creek that fills up behind the cabin 2-3 times per year. The roof on the storage building will add another 5K gallons for the year. I think we'll be set. 

Eventually, I'd like to add a 2nd cistern in the 5K gallon range to use for irrigation. We'd fill it from the creek and use it primarily for gardening. As my wife can testify, I'm really not much into the yard thing these days. You can spend 30K-50K gallons per year encouraging it to grow so that you can spend your weekends mowing it. :( I would really like to put up a "Nature Preserve" sign in our Arlington yard and not have to touch it again but the city and our neighbors tend to frown on that kind of behavior. If they're going to spend money and time, everyone else should have to also. I understand that. It's one of the reasons I love having property in the country. No HOAs, no city codes. Everyone does what they want to do and leaves everyone else alone. Besides, the only people who see my property are friends and relatives and they show up for the BBQ, cold beer and witty conversation. :)


Wednesday, April 1, 2015

Why My Wife And I Are Building A Tiny Home

My wife and I are building a tiny house (12′x20′) in East Texas. We had no desire to be mobile. We wanted a solid foundation and construction that was sturdier than we could justify on a trailer. Size was also an issue. The width constraint on a trailer just felt too restrictive. That said, 240 SF is not very large. We will end up with additional property taxes that some with “mobile” home will not but not at a huge cost. We also wanted ample room for storage and a workshop without the burden of that space being taxed as living space. 


We’ve been building it over the past year with whatever excess funds we had that month. We hope to finish it within a 2 year period of when we started. We’ll have somewhere between $11K-$12K into it. I have slowly moved down in size of dwellings as the first house I purchased years ago was 3000+ SF. We're now living in 1700 SF but on a very small lot. Our new house will be on 12 acres of woods which will provide for much of our entertainment and daily activities. 


I look back at my Grandparent’s house that was a 2BR/1Bath at around 1000 SF. It was plenty for them as they spent much of their time fishing and hunting. For me, the draw to a tiny house are the financial benefits:
1) Building costs – every square foot you add to a plan increases all of your expenses
2) Taxes – straight forward, square footage = taxes. The smaller the better.
3) Utilities – smaller footprint, cheaper to heat and cool.
4) Insurance – for permanent buildings, insurance is based on square footage & value
5) Upkeep – smaller building means easier & cheaper to maintain.


It’s not living in a tiny house that’s appealing, it’s the comparison to what we're spending now that's the huge draw.
Mortgage $1,300/mo vs $0
Utilities $380/mo vs $60
Taxes $3,800/yr vs $930 (house plus 12 acres east of Dallas)
Insurance $2,100/yr vs $390
Upkeep $1,000/yr vs $100


The $25,000 per year difference will allow us to make BIG changes in our lifestyle. If we continue working, we can put an additional $2K per month into our retirement fund. When we’re ready to retire, we’ve now stretched our funds to 2-3 times what they would cover before. That either affords us a lot of indulgences like improvements to the property, travel, or lifestyle, or it allows us to retire with a comfortable spending level nearly 10 years earlier. 


Either way, whatever your priority, it’s a win – all because we are willing to have a living room that converts to a bedroom at night. Everyone has something different that drives them, something that makes them stick out their chest and look around with pride. For some, it’s having a massive status symbol built close to the curb so that everyone that drives by will be envious. For others, it’s the peace and freedom that comes from getting out of the rat race.


Tuesday, March 31, 2015

(Mar 30) Flooring Installed!

We came out this weekend to work on the storage building but just couldn't get motivated. Decided instead to install our flooring in the house. It'll mean having to cover it when we put up the ceiling and paint but we couldn't stand looking at it sitting there in the boxes any more. :)

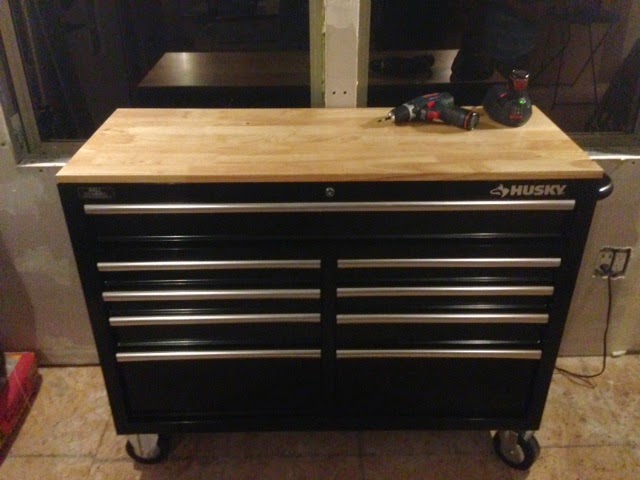
Riley was with us for the weekend. He helped us put the casters on Kim's new tool box and then organize the tools. This actually helped a great deal. Good to know that everything was in it's place!

Kim's early Birthday present! She loves her tools! 

We only had a couple of places that had to be sanded on the subfloor. Glad for it too. Even with 60 grit and an electric sander, it took a while and made a huge mess. Finally used the shop vac to act like a dust collector.

The flooring went in pretty smoothly. Tongue and groove vinyl planks from Lowe's. They snap together OK on their own but if you want it tight with no gaps, you've got to convince it! I would stand on the completed portion and kick my tennis shoe sole in the direction it needed to nudge. They recommended a rubber mallet but I didn't have one. Kicking it into place worked pretty well but my foot was swollen and sore after the 3 hours it took to install. I guess if I'd had a mallet, my arm would be sore instead. :)


I really thought we would have to nail the 1st row in place but after it was all linked together, it weighed about 700 lbs so I guess it's not going anywhere. I was very pleased with how it laid smoothly on the floor. No hollow spots and it looked great. It cuts great with a mitre saw or hand saw. It should be very durable. Being waterproof was one of the biggest selling points for me. There are numerous places at our other house where water has penetrated the Pergo flooring and it swelled under the finish.

Working out the logistics of cutting a piece piece to transition the doorway into the bathroom. I got the piece cut just right but this flooring is taller than the tile in the bathroom so I'll have to put in a step-down cover to complete it. 


Running the flooring longwise had the desired effect and made the room look longer. This also meant the grain runs along the same direction as the traffic flow so it should wear great. The good news also is that it went down relatively easily and will come up even easier some day when it needs to be replaced. At ~ 200 sf, it won't cost a fortune either way.

We got the IKEA corner cabinet assembled for the kitchen last week. They have legs that you attach and set the unit on instead of the frame around the edge. Legs have screw adjustments so you can easily level the unit and stabilize it across rough flooring if you need. Luckily ours was nice and flat. I decided to floor from wall to wall instead of just up to the counter and appliances. We burned through an extra box of flooring but if we ever need to redesign the layout, it's all floored the same.

 We bought our counter tops for the kitchen and laid them out to get a feel for how they were going to look. We also brought our Elfa drawers that we'll be using in the kitchen and in our closet. We had to cut them down to fit under the counter top. Kim was really nervous taking the dry-cut metal saw to her Elfa units but they came out really nice. Except for the one that I cut on the wrong end! :( I'll be replacing that one this week. Otherwise, we cut them to the exact height of the cabinet so that the counter top rests on them and holds them snugly in place. I'll put a stop block in when we finalize the whole thing just to make sure they don't shift. Really a nice option for ready made drawers that have the industrial look she likes.


We'll have these 2 sets plus a larger set in the kitchen along with 2 larger units in the closet. Those will be 41" tall compared to these at 35". The other unit in the kitchen will have casters and a butcher top so we can roll it out from under the counter and use it for cutting or extra counter space when we need. It's the unit we've had at our Arlington home for the past 5 years. Still thrilled with it. It's on our short list of "BEST" purchases we've made over the years!

Next week, we'll cut the countertop to length and put the support ends on as well as cutting in the sink. We verified we've got plenty of room for the fridge to slide in and out on the other side. The other side of the counter will get an end next to the stove. I'll be working on installing the stove conversion kit from natural gas to propane this week. It'll be so nice to get the walls finished so we can bring in the rest of the appliances. It's really starting to feel like a house now. The floors and counter tops made a huge difference. Being able to take a nice long shower was just the cherry on top. :) I'll post pictures of the instant water heater next time along with (hopefully) some completed pictures of the kitchen.

Stainless Steel corner double sink from IKEA. 


Monday, March 16, 2015

(Mar 15) One Wall Done on Storage Unit

Got to spend the day on Saturday with my younger daughter, Sabrina. We came out to work on the storage unit. She was a tremendous help and I love spending time with my girls! :)

It was raining all day - just a fine sprinkling, but we finished the framing on the North wall and got all of the corrugated metal put on it. I think it turned out pretty good!


We worked on framing out the South wall but ran out of daylight. We had planned on staying the night but we were both wet and tired so we packed it up and decided to rest on Sunday. Another couple of days like this and we'll be ready to put the roof on. It will be so nice to get all of the tools and supplies out of the house so we can finish it.

Friday, March 6, 2015

(Mar 6) Floor Plan Design Features

I keep getting a lot of requests for details on various features of the house my wife and I are building so I though I'd take the time to map out some detail of the floor plan. Only significant changes from the last design are the addition of the bar and some of the features around the desk. I really didn't want to give up my bar. I was really excited when I realized that it would back up nicely against the computer desk. It currently has a solid back but I'm considering changing it out for glass. If I leave it solid though, it would make a great place to hang a bulletin board or a pegboard for the desk.


Bar. We took a salvaged part of an entertainment center and wired it for LED lights. I'm glad it'll be moving to the new house!


Wednesday, March 4, 2015

(Mar 1) Major Layout Changes

We had 3 days of freezing weather and ice over the past week. I guess we got cabin fever even though we didn't go out to the property until yesterday. It did give us some time to reflect on the whole Murphy Bed situation. We had planned on having a sleeper sofa for guests in the living area but most were mildly uncomfortable at best. We decided, since this was going to be our resting and main seating, that the sofa portion would be a priority. If we could find a good sleeper on a great sofa, we would consider it. If not, we would just go with a nice sofa. For the twice a year that company comes to stay, we could pull out an air mattress. It would be more comfortable than any of the sleepers we had looked at over the past year.

We stopped in at Haverty's as we had not checked it off of our list yet. There we found the mother of all sleepers - Comfort Sleeper by American Leather. I've got to warn you though, the sticker shock took a while to shake. Here was a great seating sofa with an awesome sleeper mattress. It actually folds out to a flat platform (no bar poking you in the back) and has a premium mattress. I couldn't get over that it was firm and solid and flat as our bed at home. The sofa portion was full and very homey.

We decided we would make this our primary bed and scrap the Murphy Bed for now. That would free up room in the cabin for a lot of things we had been sweating - full-sized appliances and more counter space in the kitchen, a computer desk, a wood burning stove. It meant shelving 3 months work on the Murphy Bed concept that I had been designing but it was a good solution to a lot of problems. We also moved the stove to the south wall to accommodate a vent-a-hood and rotate the sink to the east wall. This meant we could leave both windows in the kitchen area. Something I was adamant about.

Floor plan as of March 1

We changed the location of the closet to the south wall. This solved the problem of fully opening the doors to facilitate the pull-out drawers. It also gave us another 4" of closet width to work with which doesn't sound like a lot, but every inch of storage is going to be critical when you're dealing with less than 250 sf. We will have to cut the height of the closet by about a foot, 8' instead of 9'. Kim doesn't mind since she can't reach the top of either one! :)

Since the bed was no longer a concern, it meant we could put a small computer desk (39" wide x 24" deep) along the adjacent bathroom wall. I like my Mac Laptop but I really love having a large screen to work on. This will accommodate both. It also gives us ample room to organize bills and paperwork. Not that we have much now. I tend to scan and store almost everything that comes to us on the computer. It's nice having all of this information at your fingertips, even on the road, with the help of DropBox. I will have to run some electrical conduit/wire under the cabin to the floor at the base the wall - Computer, Wide-Screen LED, Scanner, Printer, UPS Battery Backup. Plenty of room to take the hutch on the desk up to 8' if we need. This will be very helpful!

We have also budgeted space for a wood burning stove - The Hobbit by Salamander. It doesn't have everything that I want in a stove but it's feature rich for the price. Since it has a large glass front, we wanted to be able to watch it from the main seating area in the living room. It will have to compete with the 6' window and the TV but I'm sure it can hold it's own. :) It offers a cooking area on top, rear flue, fresh air draft and a secondary burn feed. You can substitute a hot water heater for the fresh air attachment but you cannot have both at the same time. It's rated at 13,000 BTU max which should be fine here in Texas. There were a couple of times this winter that our 9,000 BTU propane heater would not keep up and I look forward to the extra horse power when we need it.