Monday, June 15, 2015

(Jun 14) Bathroom Wall Sided

You all know the saying about the best laid plans . . .  We made our plans on Saturday, after we finished a window tinting job in Fort Worth. We were going to stay focused and get the 3 walls with sheet rock painted. Period. We went over the checklist - brushes, rollers, drop cloth, sanding blocks (to smooth last few places that had recently been mudded), etc. We purposefully didn't buy lumber so that we could stay on task. We drove out to the property and quickly discovered that we had forgotten the paint. It was still sitting in the back of our Blazer. :(

Plan B - (because I'm not buying more paint) is now to finish the bathroom wall. Kim had eyed some tongue and groove cedar ( 5x the cost of the pine we used last month on the living room wall!) at Lowe's several weeks before so we headed to Greenville Sunday morning after a little birdwatching. Picked out the lumber as well as some other little tools and supplies we needed and headed back. We weren't back at the cabin long before a deluge of a storm hit and dumped a couple of inches of rain on us in a couple of hours.

We cut, glued and nailed boards on the North wall of the bathroom until the rain broke. We decided we had pushed our luck far enough and that we should attempt to get out of the driveway before it had soaked/softened too much. I really didn't want to be out there after dark trying to get the car out of the mud again.

We got out just fine this time. I feel like an experienced rally road race driver these days. I go through the course in my head a couple of times, I tighten my seat belt, then I floor it - sliding, drifting and slinging mud for the better part of 400' 'til we hit a dry spot so that we can re-coup to make a run at the last 50' of the driveway. I wonder what big mudder tires would look like on my little Hyundai? lol

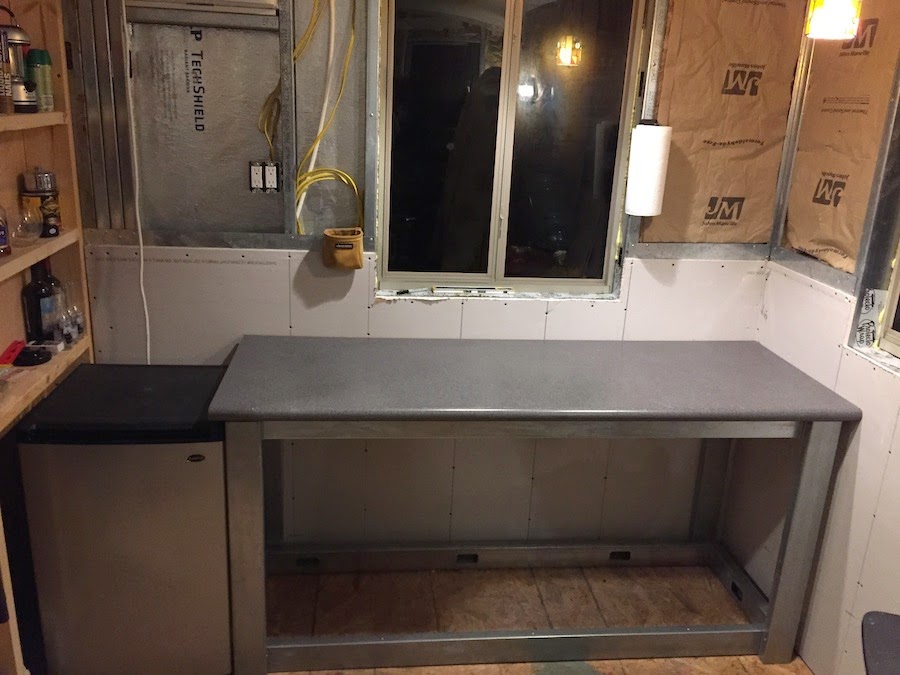
The experience may continue. We've also hit some snags on our refinance and may NOT be getting the driveway and grid-tie we were hoping for this summer. Time will tell. Anyway - here's a photo of the wall we worked on this weekend. The table saw got wet with all of the rain and I didn't want to rick electrocution so I couldn't rip the very last piece but we'll do that as well as a custom piece of cove molding on the router next time.


We haven't decided on the window trim style for this window yet but are planning a mirror on a hinge that will cover the breaker panel.

On a serious note, my younger daughter, Sabrina (who just graduated HS in 3 years! :) was helping me on a window tint job last week when a 6" razor she was using slipped and hit her in the face. She cut her face pretty deeply and smacked herself hard enough to loosen 2 of her teeth. She's fine now, save some fresh stitches and short a little blood. Another of life's milestones. It seems to slap you quickly with a reminder that things can go bad very, very quickly. I must say, the surgeon took his time and did a really nice job, trying to minimize the scarring.

She's a real trooper. She told the doctor at the emergency room to just finish, even though the lidocaine had worn off before he finished stitching her and was back on the window tint job the next day to help me finish up. "Thanks" to all who have reached out with prayers and thoughts. :)


We'll be back at it again next weekend - Lord willing and the creek don't rise! I say that because there's a tropical storm hitting the Texas coast and heading this way in a couple of days. The flood waters are still pouring over the local dam. Can't wait to see what this brings!

Monday, June 1, 2015

Misc Photos

Original floor plans called for a Murphy Bed and smaller kitchen.
Kim's birthday present. She loves her tools!

Water System Photos

I'm really hoping that all of this works out and pays off. The city water service is $600/yr plus any overages. I'm hoping that we can come up with a safe way to treat our water that we catch off of the roof. If so, we should be ahead by the end of year 2. I'll add a 2nd cistern for water out of the creek to use for irrigation. Don't see any sense in that though until we move out here full time.


Loaded up and headed home. A tank of gas saved me the $250 delivery fee. I've just got to figure out how to unload it by mylself!


Unloading turned out to be pretty easy. Get is started rolling and get out of the way. 250 lbs but it tipped over upright easily.


Kim, pounding in steel rebar anchors for pad


Boards on completed pad to roll cistern onto


Cistern in place on pad. I lucked out in that I miscalculated the width of the tank. Luckily we had an inch or 2 to spare. :)


View of cistern beside house


Shower system on back of house ready to plumb to cistern.


Gutter up and attached


Gutter draining into cistern


(May 31) 1st Window Trimmed

Made it out on Sunday to do a little work. Weather's been really pretty for a couple of days but still lots of standing water. There's still a solid flood coming over the top of the Lake Tawakoni dam. It's quite a sight. There was a line of people standing roadside watching. After so many years of worrying about the lakes drying up, now people are worried about their houses getting washed away. There was still some water standing at our property but not bad, mainly in the road! Hopefully, we'll have a driveway put in this summer.


Riley, our grandson, came out with us. He's always lots of help.


We decided to finish framing the window we cut for last week. Kim got all of the boards painted and set out to dry as I cut some pieces for another window. The paint looks really nice on the smooth pine. We had to make a few adjustments as we put the frame together but it looked great when we were finished. The hardest part was figuring out the angled cuts on the wrap-around trim. I think it's time also for a band-saw. I've been cutting the notches for the sills with a jig-saw but would really like for those cuts to be a little cleaner.


We'll caulk some of the edges and give it one last coat of paint. We keep marching a little closer to finishing. It's very exciting!


Storage Building Photos

Our house actually started out to be a storage building. We were going to keep our building materials and tools in there as well as camp in it while we were building the house. The more time we spent in it, the realization that it could work as a house sank in. We eventually figured out that we really did need a storage building. It was just getting to be too much with all of the tool and supplies stored in the house while we were trying to work on it. I got the idea of making a building out of recycled warehouse pallet racks, like the use in Home Depot and Costco. 12' by 12' with 12' ceiling. Very strong. Pre-assembled. It went OK until we started working on finishing it out. The steel just made it very difficult to deal with getting it sealed off from bugs. It's still a work in progress. At least we have everything that's non-essential out of the house though! That has been a blessing.


1500 pounds of Steel was about all I could haul with my truck at one time. Had to stop and put some extra air in the tires. :o


We laid the rails out and then leveled them with cinder blocks


Large steel bolts through 4"x6" lumber should hold the upright in place


One upright done. Five to go.


All of the uprights attached and the floor rails installed along with the floor supports


Upper rails attached and the frame is done


Attaching 3/4" decking

Rafters going up


Setting final pieces before the roof goes on


Roof deck on along with wall studs


Sabrina, helping frame the outside of the building so we can attach galvanized steel


Frame completed on North side


Steel panels installed and ready to move on to East wall. Starting to take shape.


3 walls completed with steel siding.

Sabrina, standing next to completed wall for scale. 


Finally got the tools and materials out of the house. Storage building is shrinking quickly!


Kitchen Photos

We really wanted a full sized kitchen. We do so much cooking, I just couldn't see skimping on this. We did put in a temporary counter that Kim picked up at IKEA for $30. It served us well here for 6 months and now it's serving us again in the workshop.


We built a frame out of steel for our temporary counter


Completed frame


Temporary counter in place


Exposed wall behind AC and Fridge


AC and shelves installed in kitchen corner


Shelves finished out in kitchen


Final countertop and drawers installed along with double sink


Drawers pull out to reveal butcher top for extra work space


Faucet installed


Plumbing installed


Not a bad job on the plumbing. Hardest part was getting a hole cut in the floor for the drain pipe.

Kitchen counter/cabinet with end boards and secured to the wall

Exhaust vent added to Microwave/Vent-a-hood

Stove and microwave/ventahood

Appliances


Fridge with bathroom door


Kitchen view from living room


South Window framed. Island pulled out. 

East Window framed


Kitchen from living room


Kitchen trim replaced


New kitchen trim installed


Kitchen sink drain